Hey guys! I am Bev and I blog at Round and Round DIY Wreath Ideas, where I craft and share unique DIY wreath ideas. I’m so excited to share this gilded fall wreath tutorial with you today. The rich metallic tones and traditional fall colors work together to give this wreath a nice POP!

A couple of simple steps and a trip to your local craft store is all you need to spice up your front door in time for Thanksgiving. Let’s get started!
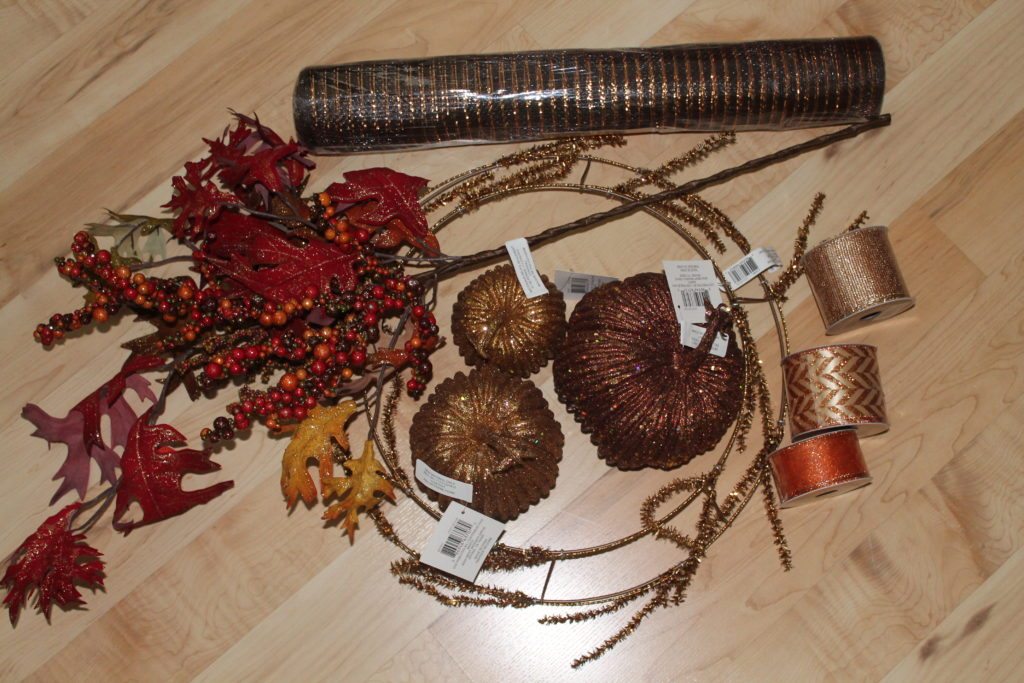
Supplies from your local craft store:
- Work wreath frame
- 1 roll of mesh
- 3 rolls of ribbon in coordinating colors and patterns
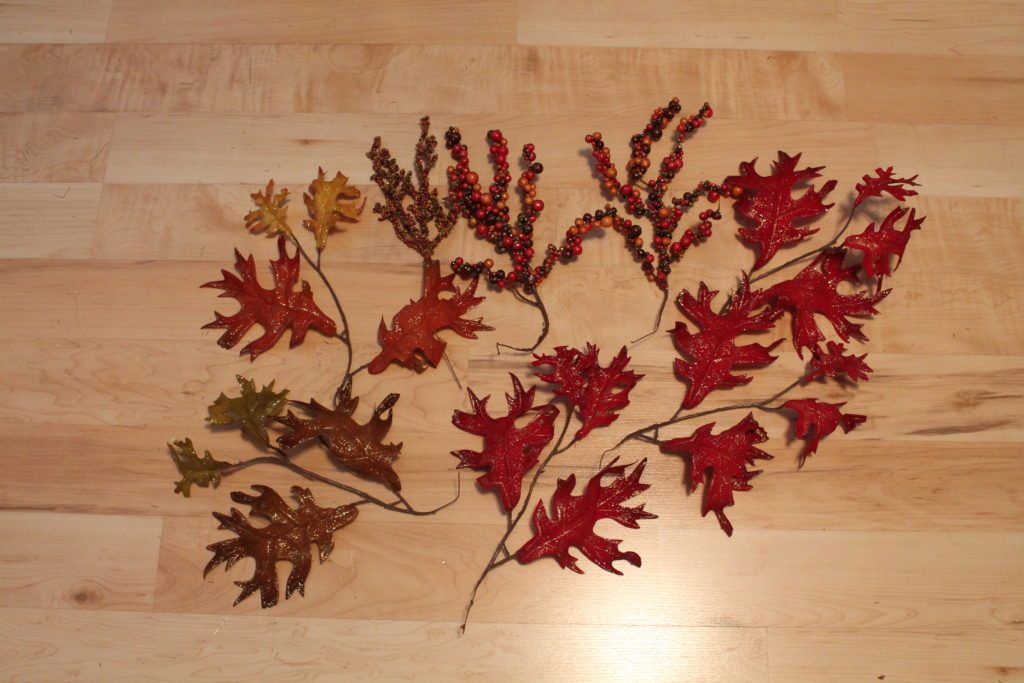
- 1 large silk stem of fall leaves and berries
- 7 foam pumpkins in varied sizes
- Floral wire
- Glue gun
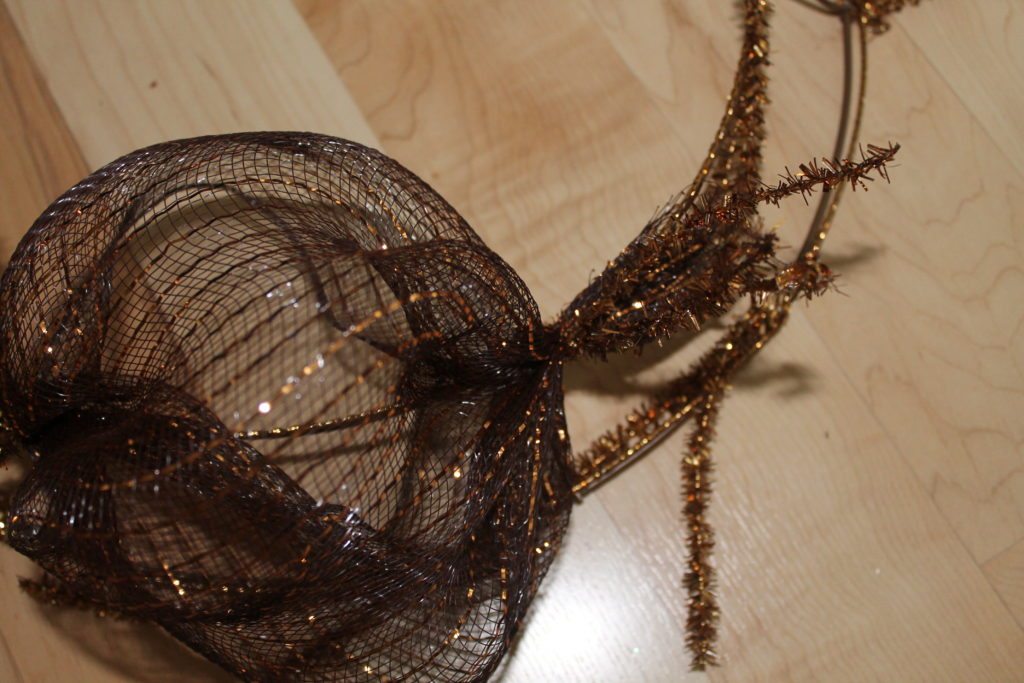
Beginning on the inside ring of the work wreath attach the end of the mesh by twisting the wire sprigs around it. Continue around the inside ring, gathering the mesh every 10 to 12 inches and attach it as you come to each wire sprig. When you have added mesh to the inside ring, move to the outer ring and add mesh all the way around using the same technique.


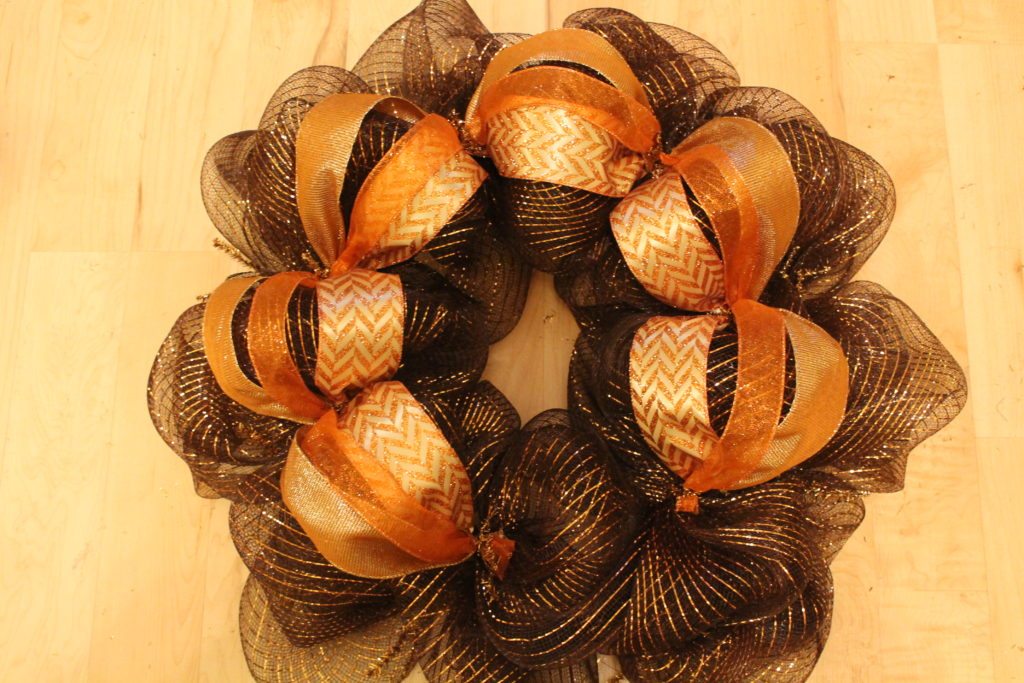
Next we add the ribbon. Take the end of the 3 ribbons and hold them together. Attach them using the wire sprigs on the inside ring of the work wreath. Continue adding ribbon around the inside ring using the wire sprigs. You should stop just before making it all the way around. This will leave space for our fun accessories.

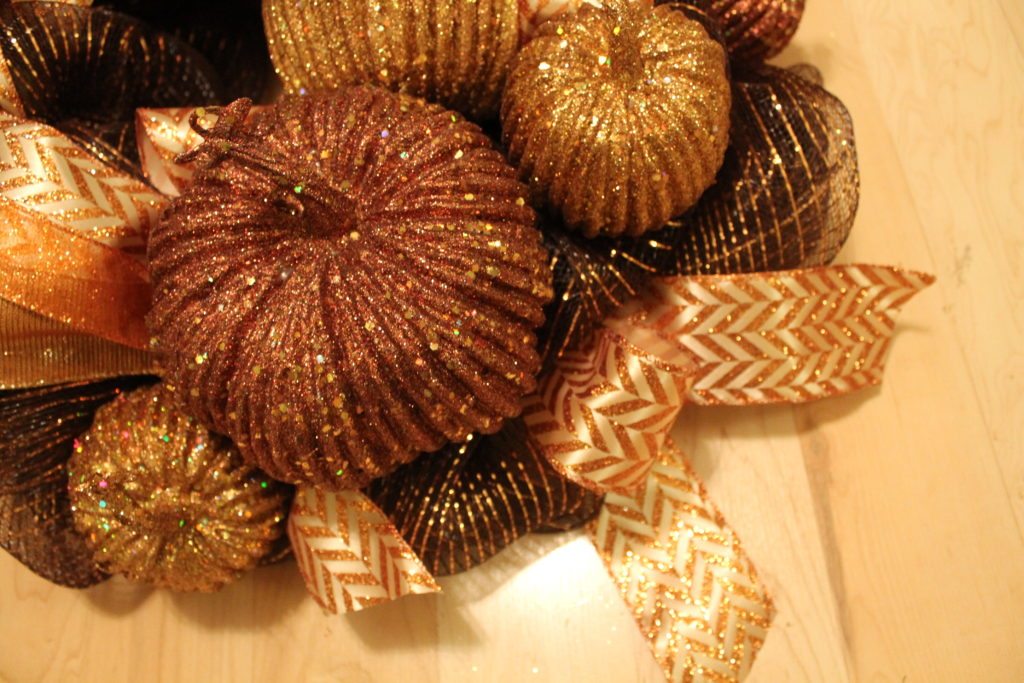
With the ribbon in place let’s add pumpkins. Simply arrange the pumpkins with the larger ones grouped in the area without ribbon. The smaller ones should be added around the outside of the wreath. The pumpkins can be easily attached using hot glue.

Now to bring brightness to the lower part of the wreath, cut ribbon into small strips and add them in and among the pumpkins. Hot glue will work nicely to keep everything in place, even these ribbon strips. I glued in a loop at the bottom for added fullness to the wreath. This will give the appearance that we have weaved the ribbon around and through the pumpkins.
Next, add a large bow to the upper left side. Attach your bow at a diagonal angle from the large pumpkins on the bottom of the wreath.
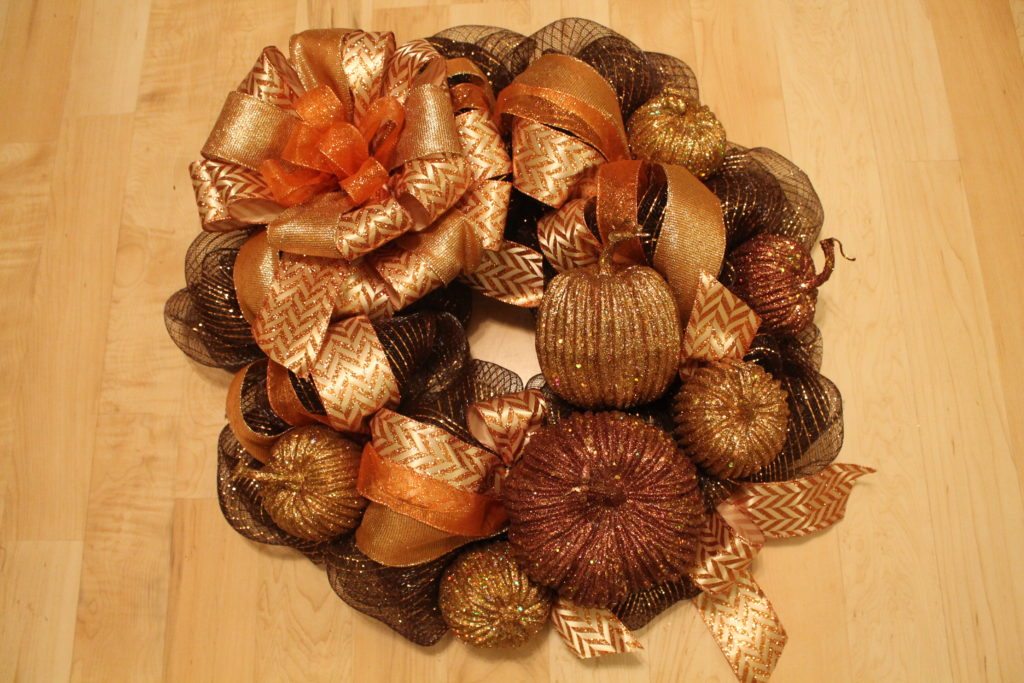
The final fall touches are the silk leaves and berries. Before adding them, clip individual stems from the large floral bush. I have found that often it’s more economical to purchase a large bush and cut it into the needed pieces. Also these larger bushes offer a broader variety to choose from. Glue the leaves around the wreath, on the outer edge, between the pumpkins and around the bow. Then glue the large berries behind the bow.
Now your new wreath is ready to hang! I hope you guys had as much fun as I did with this festive craft project.

Thank you to Vivienne for having me and thanks to you all for following along!
Bev
[…] 15. Make an Easy Gilded Mesh Wreath for Fall and Thanksgiving […]